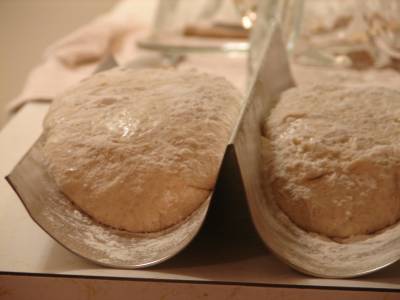
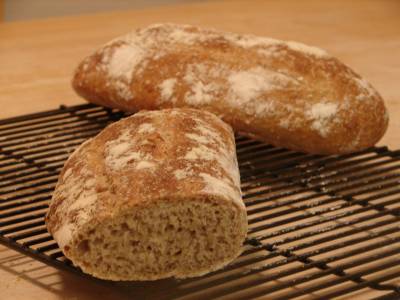
There is something special about baking a bread with a sourdough starter that you raised yourself. Will it work, will the bread actually raise? What flavor will your own sourdough starter give this bread? The excitement lies in first watching your concoction of flour and water grow over time, and slowly see life form, however the result of your efforts can only be measured once you actually use it for baking. And this is the first bread we made with our very own sourdough starter. This recipe, is an adaptation on “Norwich Sourdough” which we found at the Wild Yeast Blog – a very nice baking resource online.
And the result came out quite nice. Our sourdough starter did work, even if it might not have gained full strength yet. The thrill of slowly watching it rise over time was great (yes, baking bread with the sole leavening of a sourdough starter does take more time than baking with commercial yeast). And the flavor as well as the texture of the bread was satisfactory – the bread rose evenly and was quite airy and light, even if the result optimally would have been even lighter. The bread had a nice, mild sourdough flavor, that wasn’t overpowering, yet both pronounced and subtle at the same. The small amount of rye flour does contribute to additional depth of flavor, and slightly darker color, and the crust was perfect.
This recipe, while being time-consuming, is less so than many other sourdough breads. The verdict: our sourdough starter worked (!) and the bread turned out quite nice with a beautiful crust and a nice sourdough flavor. 2 small loaves  Ingredients: 2 cups all-purpose flour
2/3 cup dark rye flour
1 ½ cup water
¾ cup sourdough starter at 100% hydration
2 teaspoons salt
Method:
1. Combine the all-purpose flour, rye flour, water and starter in a stand up mixer bowl on low speed for about one minute. Cover with plastic wrap and allow the dough to rest for about 30 minutes. Turn the speed up to medium, add the salt and mix for about 3-4 minutes.
2. Scrape the dough into an oiled bowl, cover with oiled plastic wrap and let rise for about 2.5 hours, ideally in 75 – 80 degrees (if your kitchen is colder than that, you can put your oven on warm for a minute, then shut it off and leave the dough inside the oven for the rising period) folding the dough twice during that time. folding the dough twice during that time.
3. Scrape the dough out onto a floured surface and divide the dough in two equal pieces, it will be quite loose. Try to shape each piece into a light balls, sprinkle them with flour and cover with oiled plastic wrap. Let rest for 15 minutes.
4. Shape the dough into loaves, pinch the seams together and place in a floured couche (holding device made of floured canvas or linen towels shaped into separate folds), or use a floured two-section baguette pan. Cover with oiled plastic wrap and let rest for 2 – 2 ½ hours.
5. Preheat the oven to 475 F degrees (it is recommended that you pre-heat the oven an hour before baking). On the lowest shelf in the oven, place a cast-iron pan or a sheet pan. Above, place a baking stone or a sheet pan.
6. Remove the plastic wrap and carefully turn the dough onto a semolina-sprinkled parchment sheet (or if you let the breads rest on a two-section baguette pan, you can simply leave them on the pan) Slash the breads with a serrated knife a couple of times.
7. Set the loaves either on the parchment or on the baguette pan on the hot stone. Toss ½ cup of ice cubes into the pan beneath and shut the door immediately. Turn the heat down to 450 F degrees and bake for 27 – 30 minutes. Turn the loaves around halfway through baking for even browning. During the last 5 minutes of baking, leave the oven door slightly open. After those 5 minutes, shut the oven off and leave the loaves in the oven or another 5 minutes, still with the door slightly open.
8. Let cool on a cooling rack.
|

